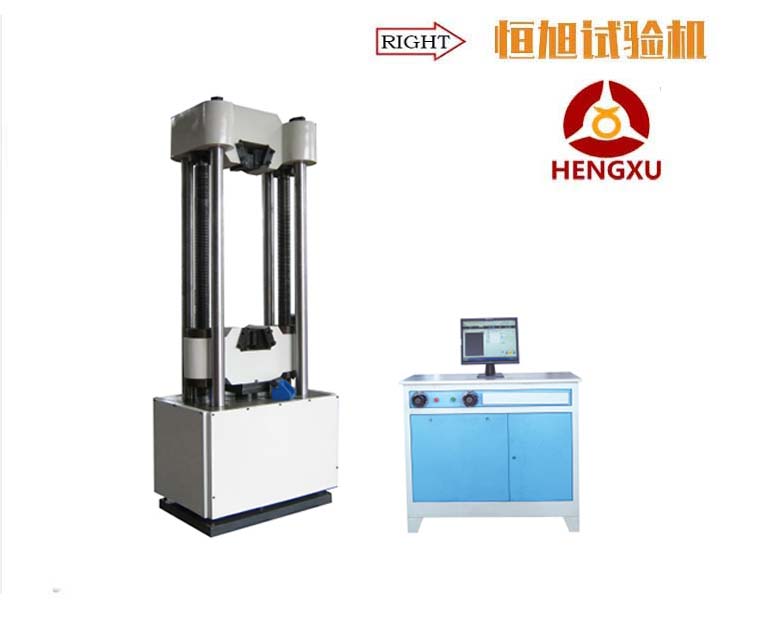
WEW-2000D computer screen display electro-hydraulic universal testing machine
Brief introduction:The main engine of the WEW-2000D type microcomputer screen electrohydrauli
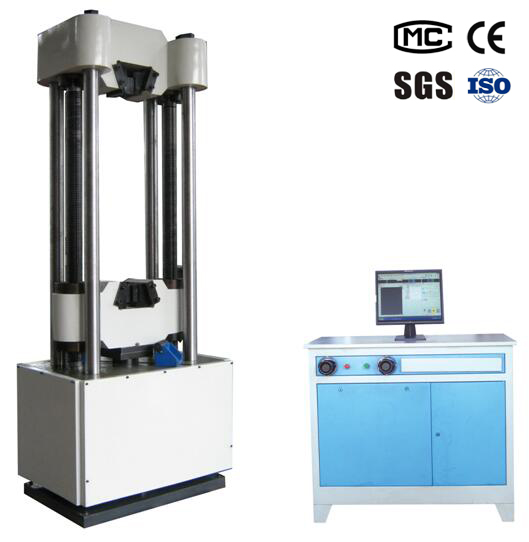
1 Introduction features: the WEW-2000D type microcomputer screen display electrohydraulic universal testing machine adopts the cylinder under the main engine. Function: mainly used for drawing, compression and bending tests of metal and non-metal. It is suitable for metallurgy, construction, light industry, aviation, aerospace, materials, tertiary institutions, scientific research units and other fields. The test operation and data processing conform to the requirements of GB228-2010 "tensile test method for room temperature material metals".
2 scheme description
2.1 host
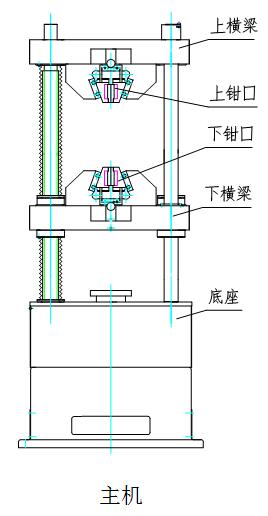
The main engine adopts the cylinder under the main engine, and the drawing space is above the main engine. The compression and bending test space is located between the upper beam and the work table.
2.2 transmission system
The lifting motor of the lower beam is adjusted by the reducer, chain transmission mechanism and screw drive to realize the adjustment of drawing and compression space.
2.3 hydraulic system
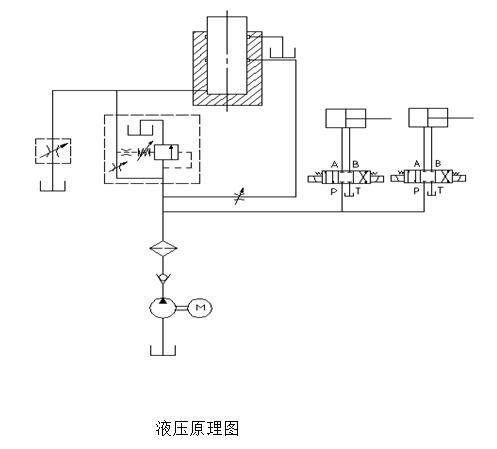
The principle of hydraulic pressure is shown in the diagram, which is for the load adaptive throttling speed governing system and the manual valve control test process.
The hydraulic oil in the tank goes through the motor to drive the high pressure gear pump into the oil road. It flows through the one-way valve, the high pressure 10 mu oil filter, the pressure difference valve group and the oil delivery valve to enter the oil cylinder. By manually controlling the opening size of the feeding valve, the flow into the cylinder can be controlled to meet the loading requirements. After the test is completed, unload the return valve and return the oil cylinder.
2.4 screen display and software system
The 2.4.1 has the screen display function of test force, force, peak value, specimen deformation, piston displacement and test curve. Easy to operate and intuitive!
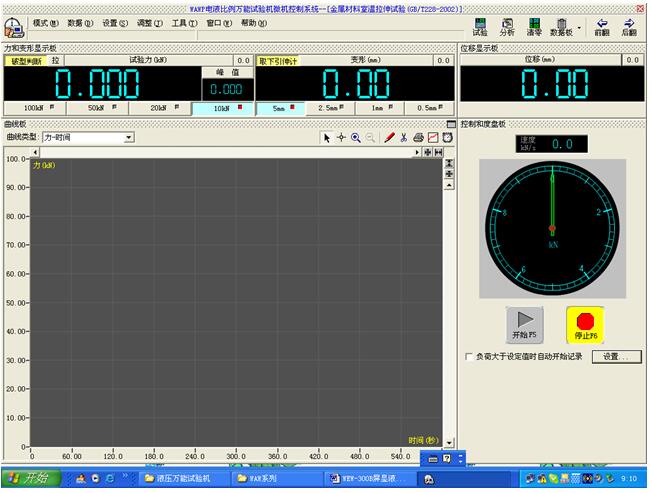
2.4.2 can complete the test data processing according to the requirements of GB228-2002 "room temperature material metal tensile test method". There are 150 domestic and international standards available for you in the software. It is convenient for you to provide prepared data and test reports to all kinds of customers (domestic and foreign) when the tester is allowed. Reflect your company's test strength and credibility
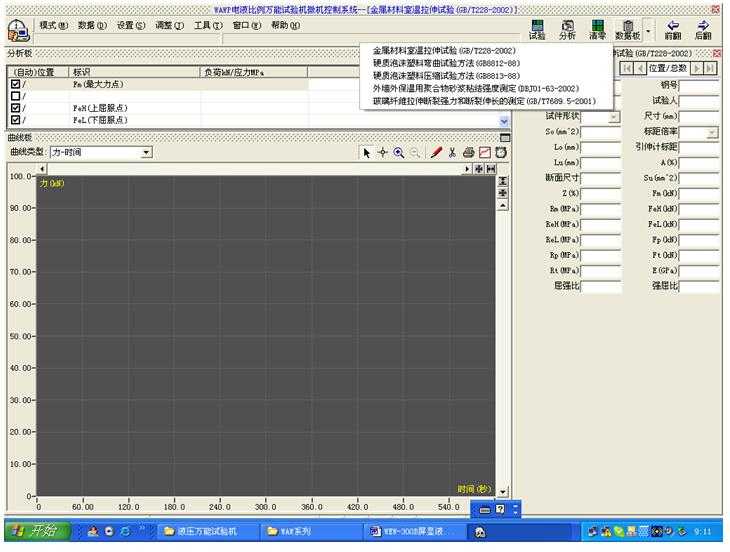
2.4.3 tests the original record value and the report value according to the requirements of standard GB228.
2.4.4 loading rate can be manually controlled, and can be displayed by force time curve.
In the 2.4.5 metal tensile test, Fm, Rel, Reh, Rp, Rt, Agt, Z, A, Rm and other parameters can be obtained automatically, and the Fel, Fm and so on can be identified manually, and the results can be printed on this basis. Printing reports and curves with different contents can be printed according to requirements.
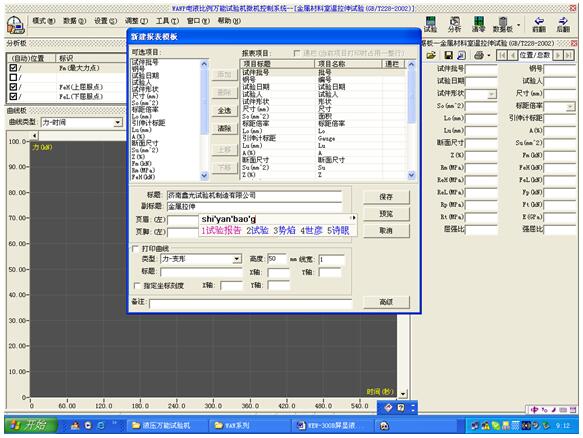
2.4.6 can output and print different forms of force strain, force displacement, force time 3.
2.5 safety protection device
A) when the test force exceeds 2%-5% of the maximum test load per gear, overload protection stops.
B) when the piston reaches the upper limit position, the stroke protection and the oil pump motor stop.
2.6 attachments
The complete set includes attachments, compression attachments.
2.7 other
Installation and commissioning tools, seals, instructions, certificates, packing list and so on, see random technical documents.
Three. The main technical indicators:
1. The maximum test force: 2000kN;
2. The range of test force measurement: 1% - 100%FS;
3. The accuracy of the test force shows: the accuracy of the indication is 0.5%.
4. Maximum stretch space: 650mm;
5, the maximum compression space: 550mm;
6. The thickness of the flat specimen is 0-40;
7. The diameter of the round specimen is: 15- diameter of 70;
8, the maximum distance between the bending support: 400mm;
9, column spacing: 750mm;
10, the precision of piston displacement is: + 0.5%FS;
11. The resolution of the deformation measurement is not less than 1/30 million
12. The precision of deformation measurement: 0.5%;
13, sensor: oil pressure sensor, photoelectric sensor, extensometer.
14, the control mode is electro-hydraulic servo closed loop control, and the control mode can be smoothly switched.
15, display mode: computer screen display test force, piston displacement, sample deformation measurement value, test curve, screen zero adjustment, calibration;
16. The size of the host: About 1200mm x 800mm x 3500mm;
17. The size of the control cabinet: 1010mm x 650mm x 870mm;
18, the motor power of the oil pump: 2.2KW;
19. The power of the cross beam moving motor: 1.1KW.
Four. The main configuration list:
1. main engine of hydraulic universal testing machine.
2. the standard oil source of hydraulic universal testing machine.
3. a special PC control card for testing machine.
4. Lenovo brand LCD computer (4G memory, 18.5 display)
5. HP laser printer.
6. electrical control box (integrated with oil source)
7.. High precision oil pressure sensor 2000KN one.
8. extensometer gauge 25mm, deformation 10 (Beijing iron and Steel Institute)
9. cylinder piston displacement sensor and connector set.
10. full digital automatic control software (containing 200 common standards for metals and nonmetals)
11. multi function test data processing software package, including commonly used test software for tension and compression.
12. a set of pipelines
13. the attached material is made of corrosion resistant and hardened stainless steel.
A. stretch aid circular clamp, 15- 70mm, flat jaw 0-40 mm clamp width 70mm
B. compression accessories 204*204
C. bending accessories pressure head Phi 30 mm span: 0-650 mm
14. a protective cover for equipment.
Equipment installation plan, plan, installation and training
Plan and plan for the installation of goods | 1, the buyer prepares the equipment installation site in advance. 2, the buyer beforehand the foundation; 3, the buyer arranges 2-3 staff members ahead of time to assist the seller in installing the equipment. 4, the seller's organization 1-2 people, after coordinating with the buyer, go to the buyer's company to install. |
Goods installation, construction organization and personnel | 1, after negotiations between the seller and the buyer, the seller will jointly install the equipment with the assistance of the buyer. 2. The seller is 1-2; the buyer is 2-3; |
Number of training | 2-3 people |
Training time | Training after installation and debugging |
Training place | Buyer's company |
Training content | The operation of equipment and the operation and use of control software. |
Training purpose | Be able to operate the test machine skillfully and complete the test process independently. |
After-sales service during the period of quality assurance
1. The warranty clause of the product:
1. Responsible for the new machine quality conditions and duration: damage caused by non-human, from the date of arrival from the date of warranty for one year, life-long maintenance;
2. We will install, debug and train the new complete sets of equipment with the assistance of the buyers.
3, charge the necessary fees for products that exceed the warranty period.
Warranty regulations:
(1) warranty service is limited to normal use.
(2) the warranty period is calculated from the date of arrival of the goods;
(3) the following reasons will not be able to enjoy warranty treatment:
1) beyond the warranty period of validity;
2) defects or damage caused by the use of this product under abnormal and unconventional circumstances;
3) users can not enjoy warranty service because of artificial damage. Artificial causes include self disassembly or modification, natural wear, mechanical breakage, water intake, fire, and failure to use user manuals.
4) defects or damage caused by incorrect testing, operation, maintenance, installation, modification or adjustment;
5) antenna defects or damage caused by non material or machining problems;
6) defects or damage caused by unauthorized repairs and dismantling;
7) purchase unrecognizable products from the day.
8) normal wear and tear.
Explanation: the company's product warranty regulations are formulated according to the national warranty regulations. This regulation will be adjusted according to the market conditions. If there is any change, the notice of change of warranty regulations issued by our company shall prevail.
Two. Maintenance standards
After receiving the customer fault consultation telephone, the engineer immediately replied. If the telephone could not solve the problem, it immediately communicated with the customer and arranged the staff to get to the client as soon as possible, and generally arrived in the 2 working days.


