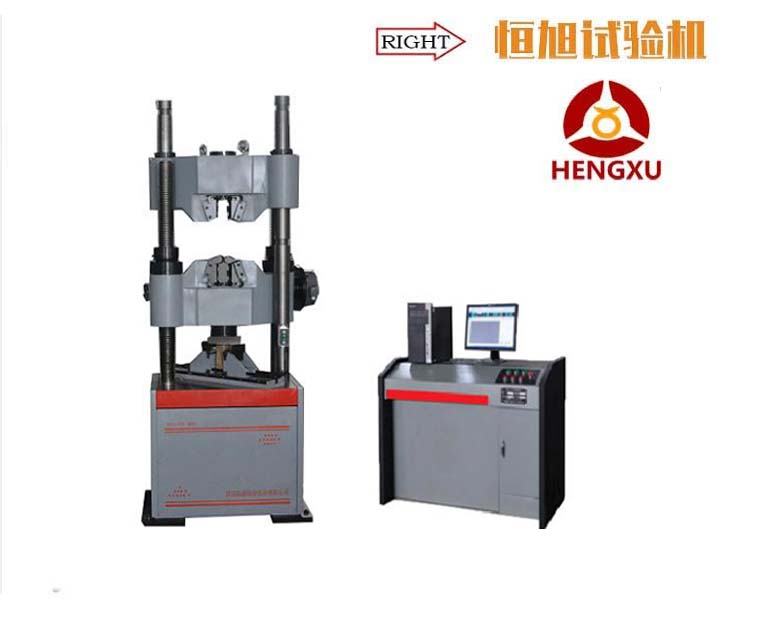
WAW-600C microcomputer controlled electro-hydraulic servo universal testing machine
Brief introduction:WAW-300C microcomputer controlled electro-hydraulic servo universal testin
First, brief introduction
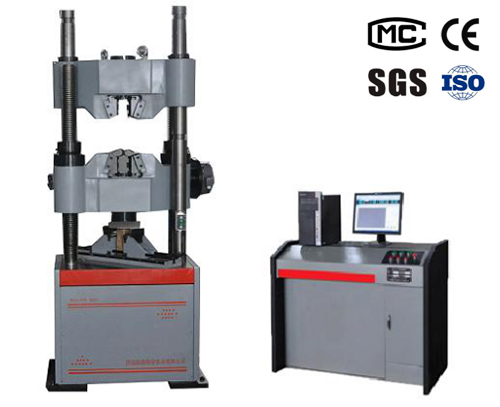
WAW-300C microcomputer controlled electro-hydraulic servo universal testing machine is mainly used for the tensile, compression, bending and shearing tests of metal and non-metal. It is suitable for metallurgy, construction, light industry, aviation, aerospace, materials, tertiary institutions, scientific research units and other fields. The test operation and data processing conform to the requirements of GB228-2002 "tensile test method for room temperature material metals".
Two. Main performance technical indicators
1. The maximum test force: 600kN;
2. The range of test force measurement: 6KN-600kN;
3. The accuracy of the test force shows: 1%;
4. Displacement measurement resolution: 0.01mm;
5, deformation measurement: standard configuration distance 50mm, maximum deformation 10mm.
6. The precision of deformation measurement: + 0.5%
7, constant force, constant deformation, constant displacement control range: 0.4%~100%FS
8, constant force, constant deformation and constant displacement control precision:
When the value is set to <10%FS, the set value is within 1%
When the set value is more than 10%FS, the set value is within 0.5%
9, control precision of deformation rate: when the rate is <0.05%FS, it is set at + 2%.
When the rate is more than 0.05%FS, it is within the set value of 0.5%
10, the maximum moving speed of the piston: 100mm/min;
11. Maximum tensile test space: 800mm
12, maximum compression space: 700mm
13. The thickness of the flat specimen: 0-15mm
14, round specimen holding diameter: [Phi] 13- [Phi] 40mm
15. Pressure plate size: 204mm*204mm
16, bending test roller spacing: 600 mm
17, the width of the roller: 140mm
18. The diameter of the fulcrum: 30mm
19, the piston stroke: 250mm;
20, clamping mode: hydraulic clamping
21, sensor and amplifier: oil pressure sensor, inserted in PC machine programmable amplifier, automatic zero adjustment, calibration
22, shape size: host: 1100 x 650 x 2325mm
Oil source: 1140 x 700 x 930mm
23, the whole machine weight: 2800 kg
Three. The description of the scheme
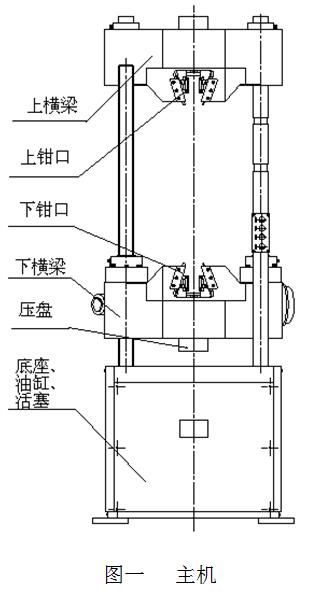
1. Host
The main engine adopts the cylinder under the main engine, and the drawing space is above the main engine. The compression, bending and shearing test space is located between the lower beam and the worktable of the main engine. The structure is shown as shown in Figure 1.
2. Transmission system
The test space is adjusted by the worm gear transmission mechanism that crosses the moving beam, so that the transmission system and the positioning system are completely separated. The geometric center of the loading system is exactly the same as the force center, which ensures the coaxiality of the upper and lower jaw and the durability of the main engine.
3. The hydraulic system (the source of the lute type oil)
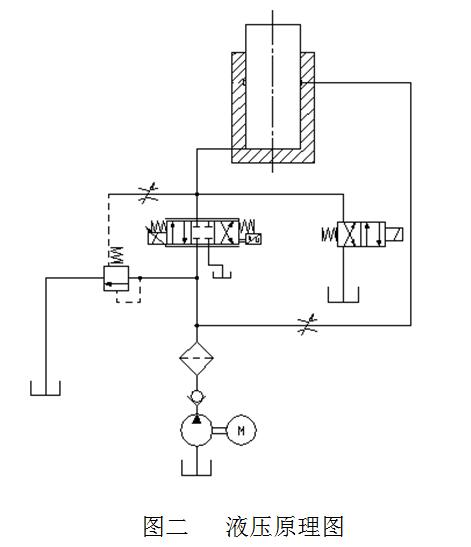
3.1 hydraulic principle
As shown in Fig. two, it is a load adaptive throttle governing system.
The hydraulic oil in the tank goes through the motor to drive the high pressure gear pump into the oil road. It flows through the one-way valve, the high pressure 10 mu oil filter, the pressure difference valve group and the servo valve, and enters the oil cylinder. The computer sends out the control signal to the servo valve, controls the opening and direction of the servo valve, so as to control the flow of the oil cylinder and realize the control of the constant speed of test, the constant speed displacement and so on.
3.2 characteristics: 1) the imported high pressure gear pump has low noise and stable pressure.
2) integrated design of power system and operation table, which is easy to operate and saves experimental space.
3) the surface is treated with plastic spray, and the appearance is beautiful.
Four. Control system
The STC300 digital closed loop measurement and control system has many advanced features and technological innovations, which are mainly reflected in:
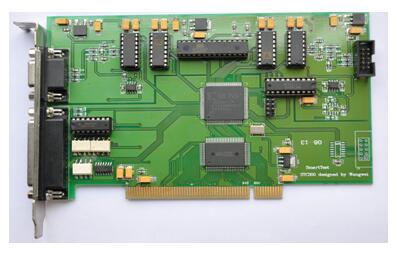
1. Four closed loop control of test force, specimen deformation, piston displacement and test process are realized.
2, the data acquisition system is composed of 4 high precision 24 bit A/D conversion channels. The maximum resolution is 1/300000, and the whole process is not divided.
3, select BB, AD, Xilinx and other original brand integrated devices, all digital design;
4, conform to the PCI bus standard, microcomputer automatic identification and installation, so that "plug and play".
5, electronic measuring system without potentiometers and other analog components, to ensure interchangeability, convenient maintenance and replacement.
Five. Control software
Comply with GB228-87, GB228-2002 and other more than 30 national standards.
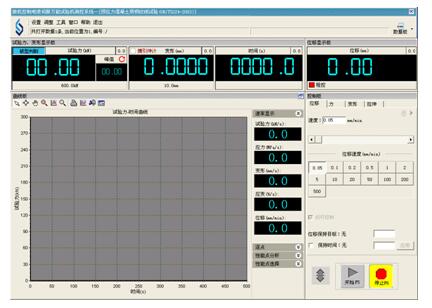
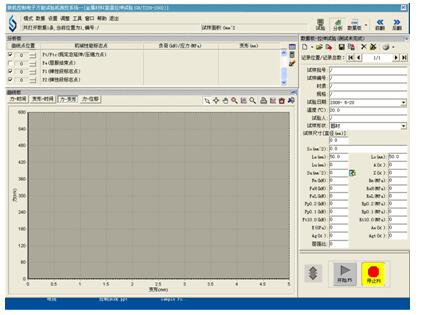
1, the computer control system has the advantages of high integration, stable performance and convenient adjustment. The experimental data can be collected in real time, and the experimental data can be displayed in real time. The test data file can be saved in the way of Access common database or SQLserve large database. It is convenient to realize the customer's resource sharing and network management, as well as the reanalysis of the user. For various user defined Word2000 reports, the software can easily be accessed and solve the difficult problems that different users or the same user have different needs on the test reports at different times. The software can deal with the original data of test force, displacement and time and the curves derived therefrom.
2, protection function: the machine has two kinds of limit protection mode of software and machine, the proportion of the automatic shutdown over the maximum load can be set dynamically; it has many kinds of protection functions, such as overcurrent, overvoltage, overload and so on.
3. Automatic marking for load channels is intuitive and convenient.
4. Batch test can achieve hierarchical display of curves and automatically follow curves.
5, the software can realize user defined speed setting and speed computer adjustment. It can also achieve high precision speed calibration, adjust the speed gear and coding at any time.
6, monitoring test process: the test force, displacement, curve and other parameters can be displayed in real time.
7, software authority classification management function: in order to improve the security of software and data, the software can be set by different password protection to realize the function of sub authority management.
8. Result reappearance function: after the test operation is completed and saved, it can be opened at any time in the future and reanalyzed the test data according to user needs.
9, the load time, load to displacement, displacement and time can be selected according to the needs of the user, and the test and data display, storage, analysis and printing can be carried out.
10, curve point by point traversal function: you can click the force and deformation values on the curve to get all parameters of each point.
11, the result contrast function: can observe several test curves at the same time, and can realize the comparison of the characteristic of the sample to be analyzed by the superposition of multiple curves and local magnification.
12. Force interface: force channel interface and test software can be equipped with various sensors according to user needs, and can calibrate, modify parameters and normal tests.
13, data sampling frequency: high speed sampling frequency can be selected according to user test requirements.
Six. System configuration list
1. Test engine mainframe oil cylinder under type mainframe.
2. Servo control use of oil source
2.1 electro hydraulic servo valve Italy ATOS
2.2 imported high pressure gear pump Japan NACH
3, STC300 Dual Channel Programmable Amplifier resolution 1/300000
4. High precision hydraulic sensor Beijing Air China
5. Extensometer YYU50-20 Beijing iron and Steel Research Institute
6, pull type displacement measurement system, OMRON, Japan.
7. The complete set of accessories includes: stretching, compression, bending accessories.
8, SMARTTEST special control software
9. Lenovo commercial brand machine
10, Canon printer
Seven. Confidentiality of technical information and information
1. This technical scheme belongs to the technical information of our company. The user shall bear the obligation to confidentiality of the technical information and information provided by us. No matter whether this scheme is adopted or not, the terms are valid for a long time.
2, we should also undertake confidentiality obligations for the technical information and information provided by users.
Eight. After sale service
The quality guarantee period is one year from the acceptance, lifelong maintenance, free service within one year, free installation and commissioning of new machines, free training operators.
1, the test equipment provided is in line with the current national standard or industry standard, so as to ensure the advanced technology and reliability of the test equipment.
2. The necessary spare parts and accessories are supplied perennial.
3, product perennial technical support, product maintenance and repair within 24 hours to provide solutions, if necessary, on-site solution to arrive within 48 hours.
4, the software is upgraded free of charge in life.
Ji'nan Heng Xu Test Machine Technology Co., Ltd.


